Before I begin, Regarding my last post I DO like Walmart…just not so much on Black Friday!
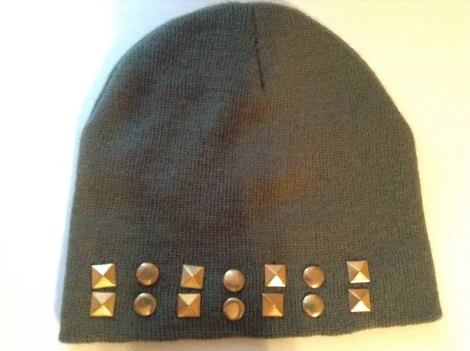
Finished Result
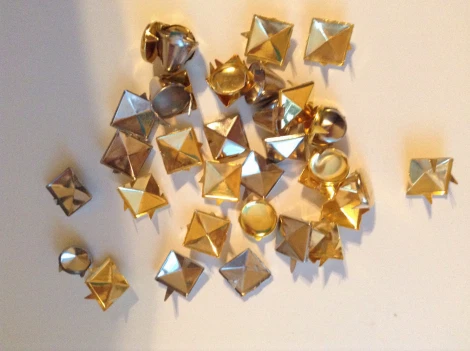
Materials needed: Pyramid Studs, Beanie (any color of your choice) some pliers (optional)
You can purchase some studs on Ebay which is what I did! You can find all kinds of studs from the original pyramid ones in black, gold or silver, you can find the circle ones like I used also along with the square studs. Along with the circles theirs even star studs! When you purchase the pyramid studs, make sure it has the pointy ends on the back so you can pin it to the beanie. There’s so many options for the studs, I preferred using gold studs, because I think it stands out better with the color of the beanie.
Ebay links down below:
Gold Pyramid Studs With Free Shipping $1.13 (100pcs)
Silver Pyramid Studs With Free Shipping $1.44 (100pcs)
Silver Round Studs With Free Shipping $0.99 (50pcs)
Gold Round Studs With Free Shipping $2.09 (100pcs)
Beanie Hat of your choice and color: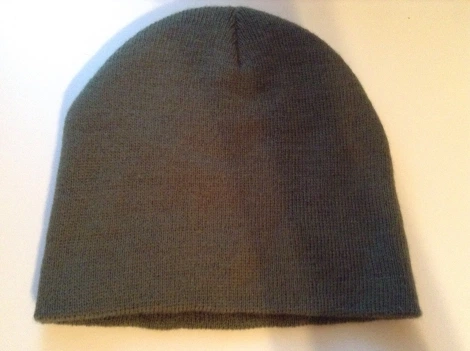
I found this one at Wal-Mart for $1.98, they also had a lot of color choices. If you don’t like this type of beanie there’s the ones with the ball on top which cost around $5-$10. I preferred the $1.98 beanie because I wanted to give you guys the most affordable options!
Beanie Links down below: I couldn’t find the link online for Wal-Mart, but I GUARANTEE you there at the store. Here’s other options..
Note: I have NOT ordered one of the following beanies.
Ebay Beanie $0.99 with Free Shipping (various colors)
EbayBeanie $1.86 with Free Shipping (various colors)
Now that you have your materials it’s time to start studding! The first thing you’re going to do is place the beanie on your head. Once it’s on you’re going to approximately measure how far/close you want the studs to the bottom of the beanie. I placed the studs as close to the bottom of the beanie (my preference). I decided I wanted two rows and in the order of pyramid stud to circle, to pyramid and so on. Once you decide if you want a pattern you have to measure how far you want them to go. Once you decide how far you want the studs on your beanie to go, you start putting them on the beanie. The back of the studs have ends which grabs the material of the beanie. Once you place the studs on the beanie, you’re going to press down on the stud to the beanie and once you feel or see the studs on the material you’re going to turn your beanie around (carefully) and lock the ends of your studs to the beanie. By lock I mean close the ends. I closed the ends with my hands because I didn’t find it difficult, if you have trouble you can always use the pliers. Once you’re done closing the ends, you should have your finished result!
This is me with it on!(Pic from last yr) I didn’t get to post this DIY last yr!

What do you think? If you try this, please show me your results! 🙂
